Advanced Flattening
요약: Ship Constructor의 Expander 플러그인은 Rhino 4.0 용이 없으므로, 이를 대체할 기능을 개발하였습니다. 이것은 첫 번째 프로토타입니다.
Contents
- Download & Install:
- For Rhino 5.0: Advanced Flattening is included in Rhino 5.0. Download Rhino 5.0 Now...
Background
Rhino 4.0 has:
- UnRollSrf - makes a flat pattern from 3-D developable (curved in one direction) surfaces. Always use this command first. If it fails, then try Squish.
- Smash - is a special version of UnRollSrf that does not check to see if the surface is developable. It is not recommended now that Squish is available.
- Squish new - makes a flat pattern from a 3-D non-developable (curved in two directions) surface or polygon mesh. In general, try UnRollSrf first.
Rhino 4.0 does NOT have:
- Unfold or unbend - to make a flat pattern from 3-D shapes made from bending up a 2-D pattern. Mostly used to create sheet metal cases, etc. Most MCAD products do this nicely, ojezu.
- Flow - to make a flat pattern for a 3-D shape made by flowing metal over a complex mold. An example is stamping a soda can from the metal disk or stamping an auto interior door panel from a flat pattern.
- Peel - to split surfaces based on where they might rip and flattens the surfaces. An example is flattening a sphere. Note: if the shape is already split, Squish may work. You can tell when and where a 3-D surface needs to be split by where it has extreme stretching or compression or the 2-D pattern overlaps.
Squish Overview
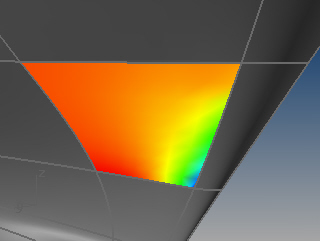
The Squish command flattens a non-developable (curved in two directions) 3-D mesh or NURBs surface into a flat 2-D pattern.
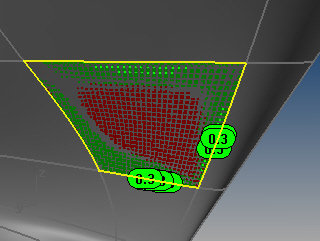
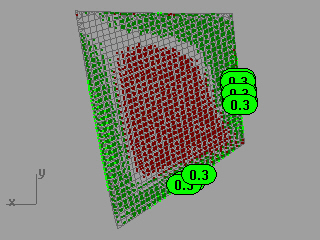
The Squish command marks areas of compression (red point cloud) and stretching (green point cloud) and displays statistics about the amount of compression or stretch.
Area: unchanged
Compression: average=0.04%, maximum=0.11% (in 44% of the surface)
Stretching:  average=0.07%, maximum=0.28% (in 35% of the surface)
Here compression means the material will be compressed when the 2-D pattern is deformed into the 3-D shape. Stretching means the material will be stretched when the 2-D pattern is deformed into the 3-D shape. The percentages in the parenthesis give you an estimate of how much of the pattern will be compressed or stretched.
Up to ten text dots mark the locations with the most dramatic deformation. The number in the text dot is the percent stretching change in length. In the image above, the green text dots displaying “0.3” mean the regions near those dots will be stretched by 0.3% (3/1000) when mapped to 3-D.
SquishBack Overview
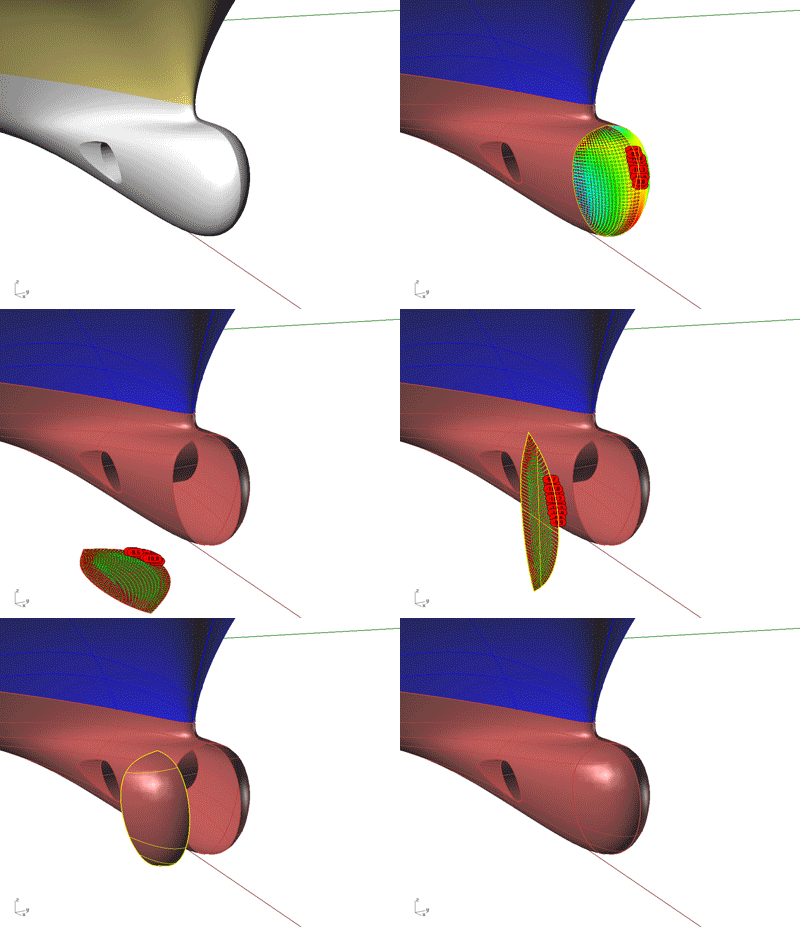
The SquishBack command lets you place points and curves on a 2-D pattern, that was made with the Squish command, and then “unsquish” them back to the 3-D shape.
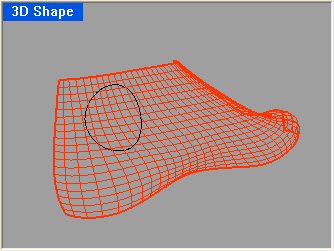
For example, suppose we wanted to put a “Rhino” brand name in the black circle on this 3-D NURBs model of a shoe last.
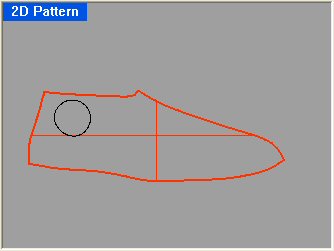
First use the Squish command to generate a 2-D pattern of the last.
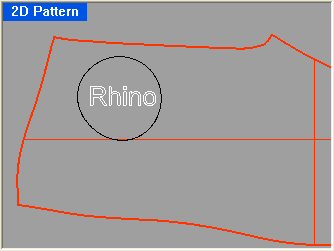
Then use the TextObject command to create the white “Rhino” text as curves on the 2-D pattern.
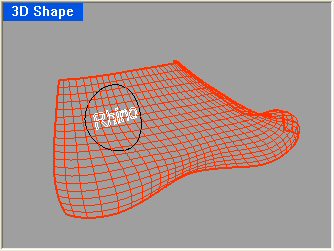
Finally, use the SquishBack command to “unsquish” the white Rhino text onto the 3-D last.
Installation
For Rhino 4.0:
- Download and Install the latest Microsoft runtime libraries (required to run Squish). (You only need to do this once.)
- Download the latest Squish plug-in. - Updated 11-January-2008
- Download the plug-in file Squish.rhp to a folder on your computer.
- Download the toolbar file Expand.tb to a folder on your computer. Activate the toolbar under menu “Tools/ Toolbar layout”.
- From Windows file Explorer, drag and drop Squish.rhp files into an open Rhino 4.0 viewport, or use the 'install' button on the Tools - Options - Plug-ins page.
- You may also need to download and install Microsoft Visual C++ 2005 Service Pack 1 Redistributable Package ATL Security Update.
For Rhino 5.0:
1. Download the latest Rhino 5.0 WIP.
Squish Command Options
- SplitSeams=Yes/No
- Use SplitSeams=Yes for meshes from a single surface.
- Use SplitSeams=No for meshes from a polysurface.
- StiffBoundary=No/Yes
- If StiffBoundary=Yes, Squish makes an extra effort to avoid distorting boundary lengths.
- Deformation=Free/StretchMostly/StretchOnly/CompressMostly/CompressOnly
- There are five built-in deformation options to choose from depending on your bias for stretching or compressing, and the ability to specify custom deformation settings.
- Free - No preference for compression or stretching.
- StretchMostly - Strong bias for expansion when the pattern is deformed into the 2-D shape.
- StretchOnly - Absolutely no compression when the pattern is deformed into the 2-D shape.
- CompressMostly - Strong bias for compression when the pattern is deformed into the 2-D shape.
- CompressOnly - Absolutely no expansion when the pattern is deformed into the 2-D shape.
- CustomA, CustomB, CustomC - custom deformations.
- CustomSetup - Used to specify settings used by the CustomA, CustomB and CustomC options.
- Material=Rigid/Floppy
- If you are manufacturing something out of a rigid material and want to minimize stresses when forming the 3-D surface from the 2-D pattern, use Rigid.
- If you are manufacturing something out of a floppy material and you want to limit geometric distortion as much as possible, use Floppy.
- If you are manufacturing using a rigid material that is inelastically deformed, let us know what settings work best.
- We can add support for more materials as we learn more about your needs.
- Decorate=Yes/No
- The red and green point clouds and text dots are decorations. To turn them off, set Decorate=No.
- Outside=Up/Down
- If Outside=Up, the outside of the 3-D surface is up in the 2-D pattern.
- If Outside=Down, the outside of the 3-D surface is down in the 2-D pattern.
Using CustomSetup to define custom deformations
The CustomSetup option lets you set the parameters used by the custom deformations. There are four parameters you can set.
- BndStretch
- BndCompress
- InteriorStretch
- InteriorCompress
The default value for these parameters is 1 and they can be set to any positive number. A larger value reduces the amount of the specified deformation compared to what happens when all four parameters are equal. For example, if you want to severly limit interor expansion, you could do something like:
 BndStretch=1
 BndCompress=1
 InteriorStretch=1
 InteriorCompress=100
If you want to preserve boundary lengths you could use the settings:
 BndStretch=10
 BndCompress=10
 InteriorStretch=1
 InteriorCompress=1
Limitations
- Does NOT (and will not) unroll, unfold, or peel.
- Does not work great on developable surfaces. Use the UnRollSrf command.
- For stamping with extreme deformations, like stamping aluminum beverage cans from aluminum disks, Squish will be worse than useless.
- No check for overlapping 2-D results.
Known Bugs
To Do
Allow selecting additional curves and points that lie near the 3-D surface and flatten them along with the surface.- Label lines and surfaces.
- Polysurface/solids support.
- Simultaneous “Squishing” of multiple surfaces, and attempt to layout the resulting patterns in the best possible way. (Olivier Suire)
- Better annotate on the plate the expansion/contraction. This is nicely represented by the graphical 'heat chart' with colors showing the relative change. This does not travel well when you go into the shop. It is my opinion that there should be 'contour' rings printed on the plate at steps appropriate to the plate expansion/contraction much like a topographical map. This way the guy on the Eckhold machine would be able to concentrate on specific areas and know which direction to work. – Paul Fuchs
- Fancy dialog interface.
Feedback
Please post feedback to Dale Lear on the Rhino Newsgroup (web version ). Be sure to use the word “Squish” in the subject line of your post.
We need to know whether or not the flattened patterns generated by the Squish command are useful in your specific manufacturing application. If you have a 3-D model and 2-D patterns that were used to successfully manufacture the object, we would like to compare the pattern created by the Squish command with the pattern that was used in manufacturing. Even if you cannot share the model, please let us know what is important in your specific manufacturing application.
- What materials are you using?
- How important is preserving area?
- How much compressing can be tolerated?
- How much expansion can be tolerated?
- How much shear can be tolerated?
- How important is preserving boundary length?
- Does the material behave differently near the edge?
