Sidebar
Brazil Getting Started Guide
This Getting Started Guide is for Rhino users unfamiliar with advanced rendering programs like Brazil. If you are new to advanced rendering, much of the learning process comes down to absorbing new terminology such as global illumination and render cache. Once you have a basic understanding of these terms, you'll find it easy to set up a rendering in Brazil for Rhino. In this guide you'll find a synopsis of the basic settings used for high-quality renderings.
Get started
- Open the example file Brazil_Pens.3dm.
- On the Rhino Render menu, click Current Renderer, and then click Brazil for Rhino.
- With the Perspective viewport active, on the Rhino Render menu, click Render.
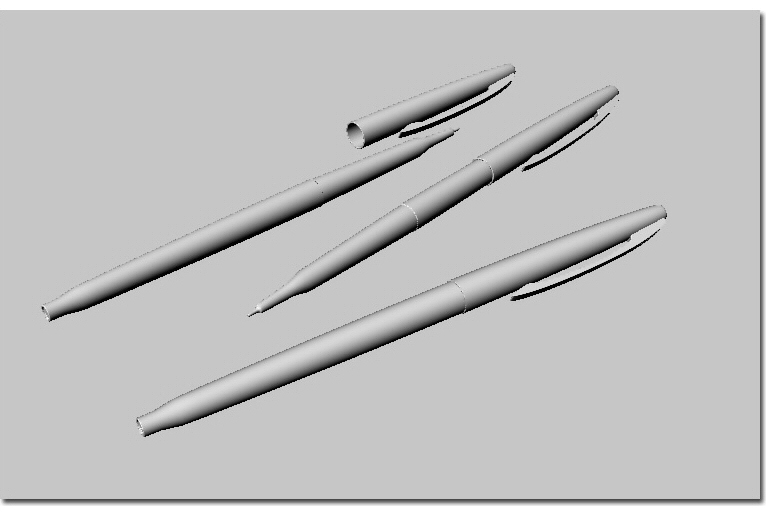
At this time, all objects in the scene are their default white color. The result should be similar to the image below.
Turn on the lights
- On the Brazil menu, click Renderer Settings.
- In the Brazil 2.0 Settings dialog, expand the Simple Luma Server panel.
- Under Skylight check the On box. The Brazil Skylight casts white light evenly throughout the scene.
- To make the rendering brighter or darker adjust the Skylight Brightness value.
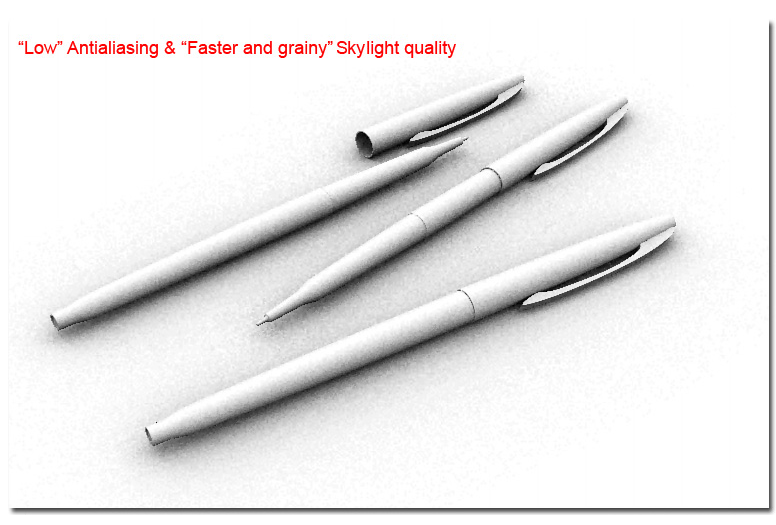
Rendering the scene with the Skylight turned on will produce the image below.
Note: You can use regular Rhino lights with the Brazil Skylight or use them on their own. Every Rhino light in your scene, such as a spotlight or rectangular light has its own Rhino Properties. Keep in mind that fewer lights result in faster rendering times.
Image resolution
Before continuing with other settings, increase the resolution of the rendering. The image produced by the default settings is too rough to use for demonstrating the other rendering settings.
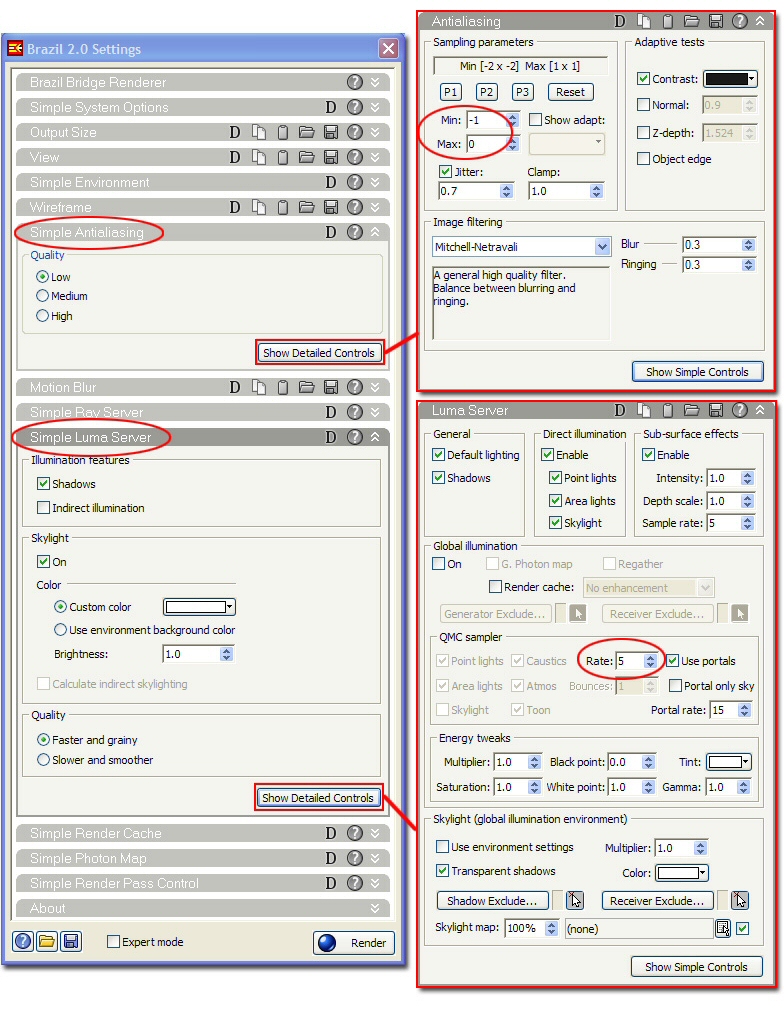
Two sections in the Brazil Settings dialog determine the rendering resolution: the Simple Antialiasing and the Simple Luma Server panel.
Antialiasing
The settings in the Simple Antialiasing panel determine how sharp the edges of your model look in the rendering. The detail of fine textures also depend on these settings. The simple options consist of three choices… Low, Medium, and High. Higher values equal sharper edges.
Luma Server
In the Simple Luma Server, in the Quality section, setting the quality to Slower and smoother will produce smoother shadow detail, but will take longer to render. The quality settings change the sample rate for the Skylight. Click the Show Detailed Controls button to see the changes to the sample rate. Higher sample rates yield smoother results.
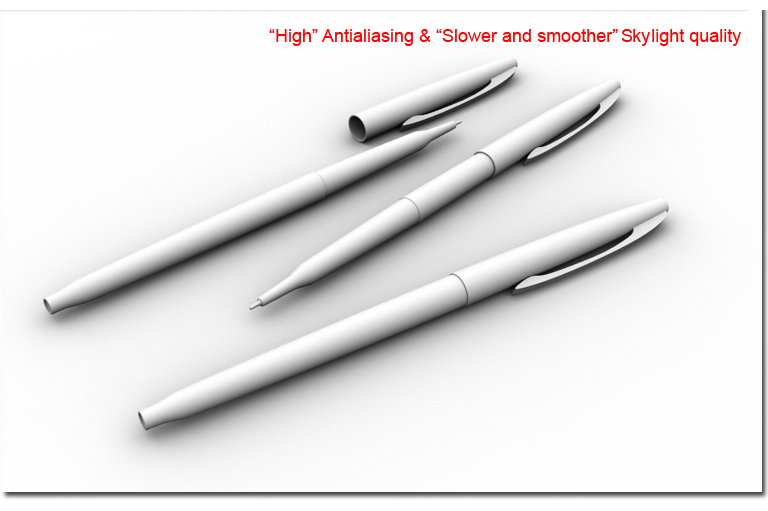
The image below shows the results of increasing the rendering resolution.
Indirect light
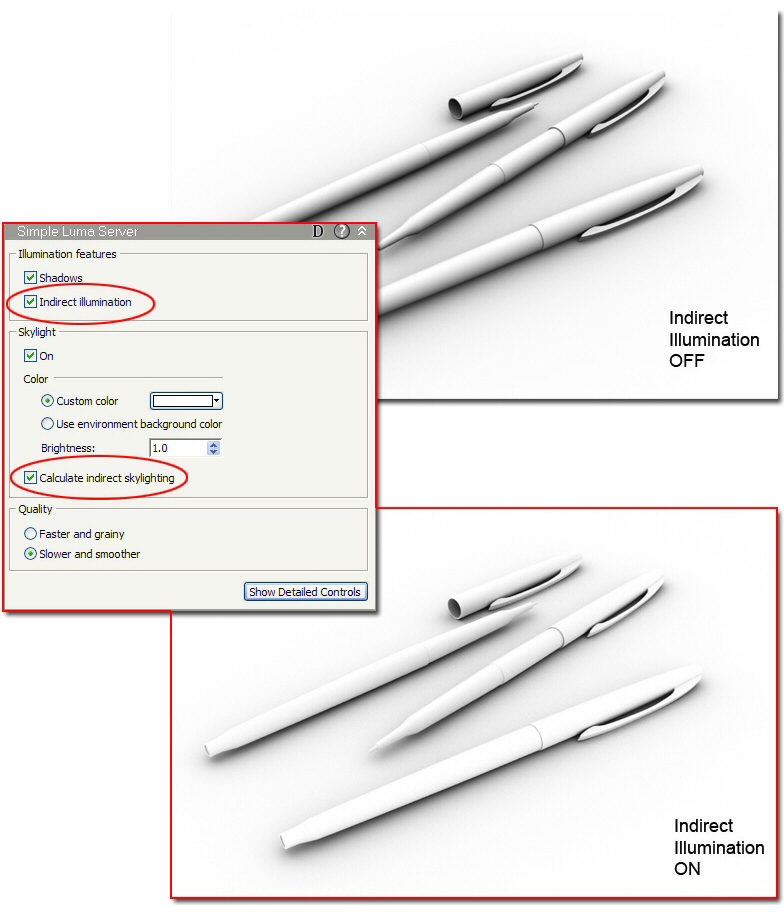
So far, the Skylight illuminating the scene has used only direct illumination. This method lights the model by shining light directly at it. In the case of the Skylight, this happens evenly around the model from all directions. The result is a nice, soft shadow where objects meet. Brazil also has an indirect lighting method called global illumination (GI). This method allows light bouncing off objects to further light the model. Both direct and indirect illumination are normally used to realistically light a model, but Brazil only lets you use one or the other.
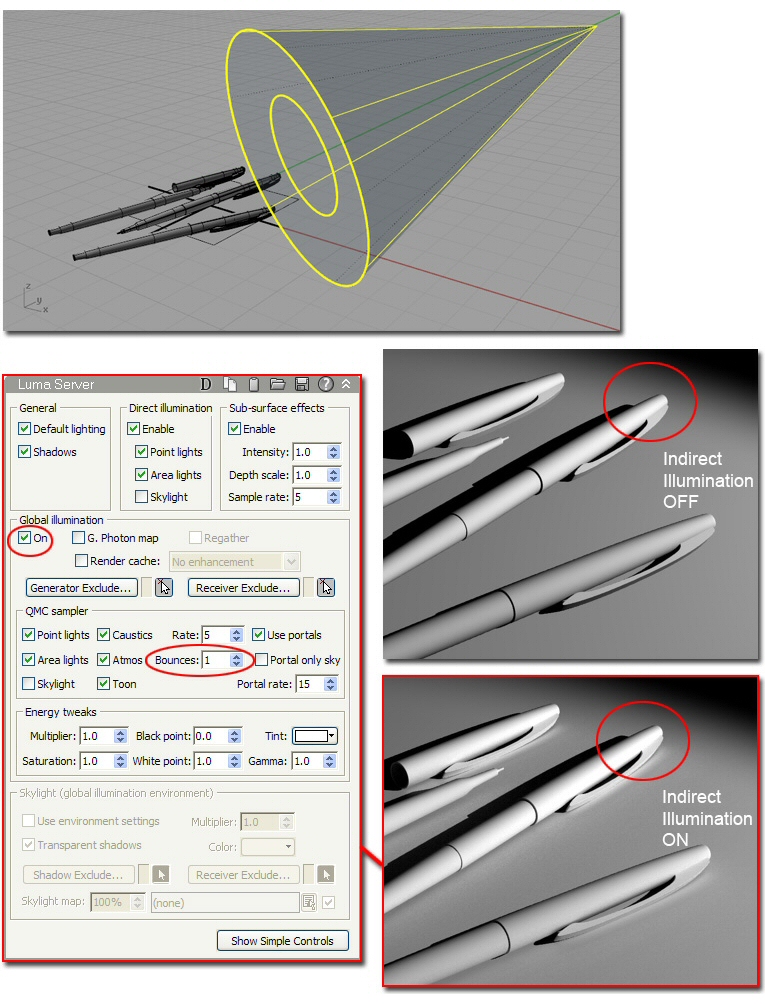
Since the Skylight shines light evenly around the model, it is easier to see the effect of indirect illumination using a single directional light source such as a spotlight. The example below illustrates a single spotlight with the Skylight turned off. The detailed control panel for the Luma Server contains a setting for the number of light bounces in the scene. When indirect illumination is calculated for the Skylight the number of bounces must be set to a minimum of two for any effect to be seen.
Materials
On the Rhino Render menu, click Material Editor.
To assign a material to an object, do one of the following:
- Drag and drop a material swatch onto the object in the scene.
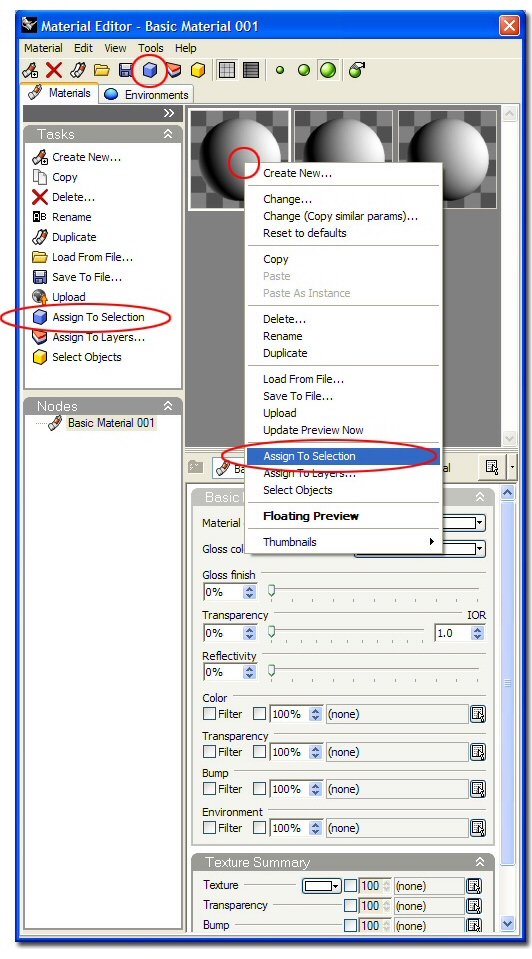
- Right-click a material swatch and assign it to a selection or layer.
- Use the icon in the Material Editor dialog to assign the current material to a selection.
- Use the Rhino Layer dialog box Material assignment.
To make a new Brazil material do one of the following:
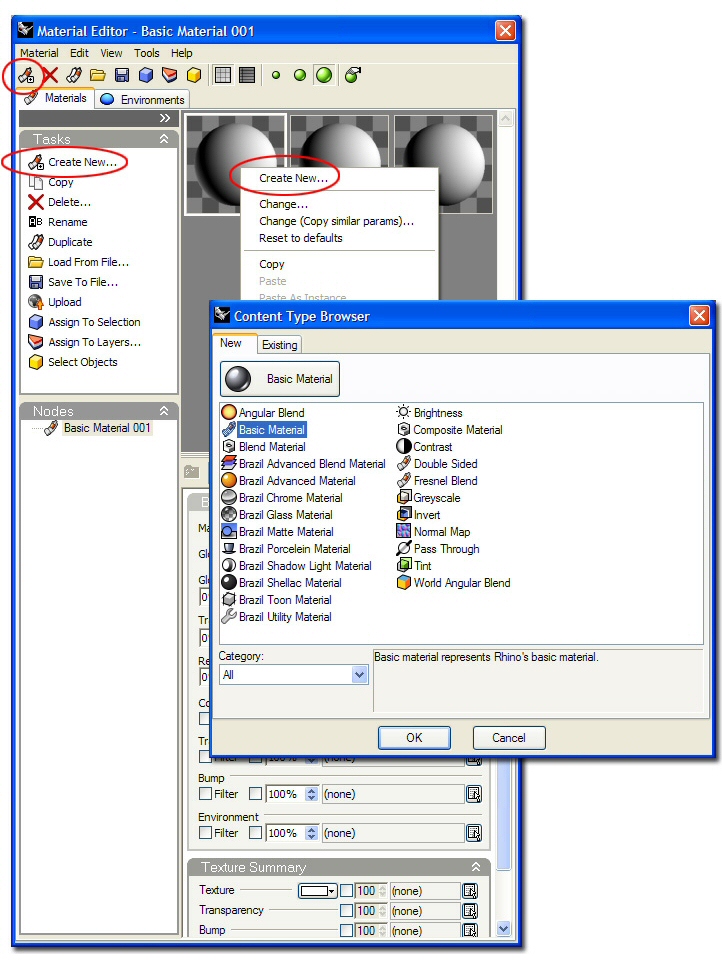
- In the Material Editor, click the Create New icon, and choose the type of material you'd like to create.
- Right-click a material swatch in the Material Editor, and choose Create New.
Several material types can be used to make just about any type of material. For example, the Brazil Chrome Material and the Brazil Glass Material can be used as a base for metallic or translucent materials. The Brazil Advanced Material (BAM) has several material types included as base shader options.
Color and reflectivity
Color and reflectivity are the first material settings to familiarize yourself with. The default Basic Material is very simple and has only a few controls available for customizing it. On the other hand, the Brazil Advanced Material (BAM) has many options and is often a good choice even for simple materials because it is so expandable.
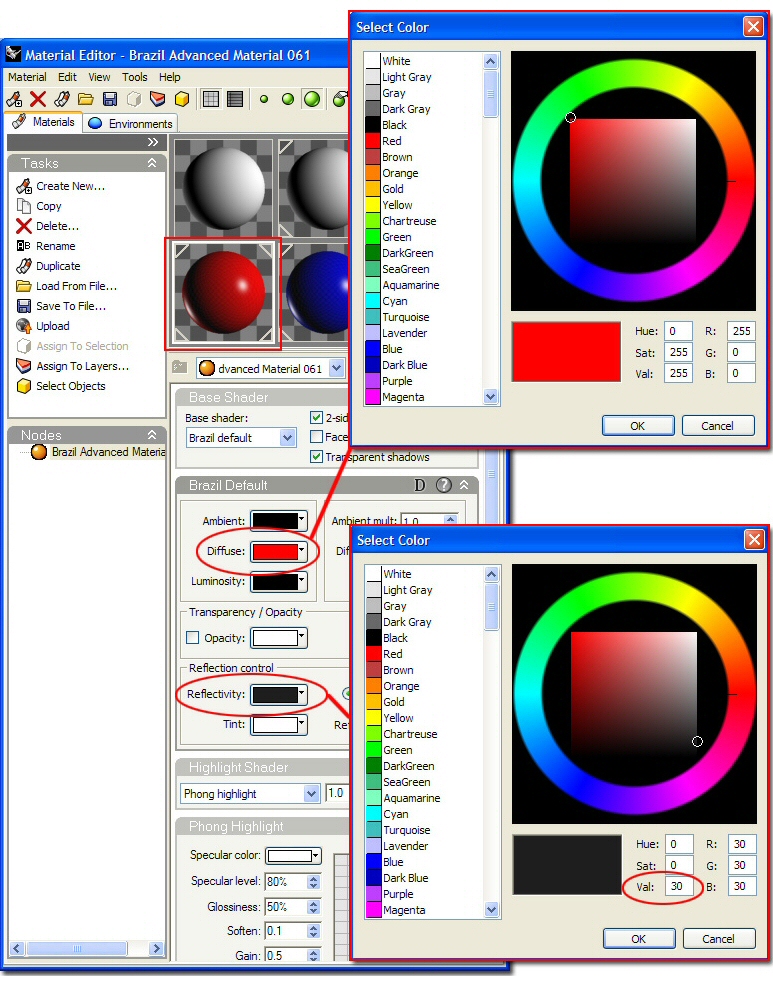
- To specify a material's color, in the Brazil Default panel, click the Diffuse swatch as shown below.
- To specify a material's reflectivity, in the Brazil Default panel, under Reflection control click the Reflectivity swatch.
Clicking these swatches opens a Select Color dialog box. The Reflectivity value can be set in the grayscale range if no additional color is desired in the material.
It may be helpful to think of materials in Brazil as simply containers for textures. A texture can be a .bmp or .jpg image or a procedural pattern already installed with Brazil such as the Noise or Tile textures.
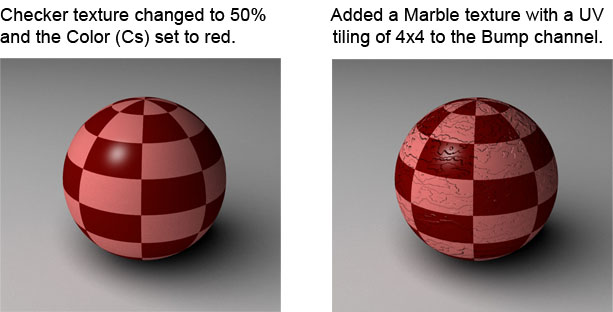
With a BAM selected, expand the Basic Surface Parameters panel. You will see several slots containing the word none. These channels are aspects of the selected BAM material that can receive textures to customize the material further. To select a texture or to create a new one, right-click the slot to the right of the Color swatch and on the menu select Change.
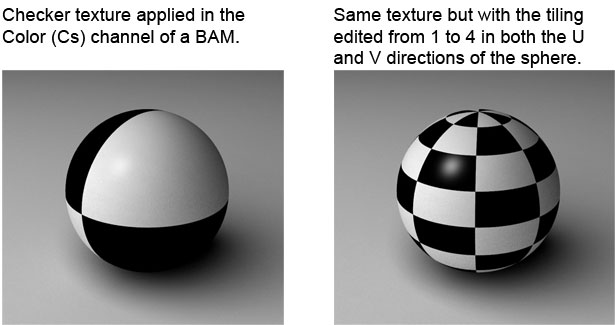
Here are a few simple uses of Brazil materials and the settings used to produce them.
The expandable panel to the left of the material thumbnails lists the Nodes in the active material. When you select a material, this panel shows all the textures applied to the material. Select a node to display its parameters in the Material Editor.
To create the checkered sphere, the Brazil Checkered texture was selected from this list and edited. In this case, the number of times a texture is tiled on the object was changed in the Local Mapping section.
Texture mapping
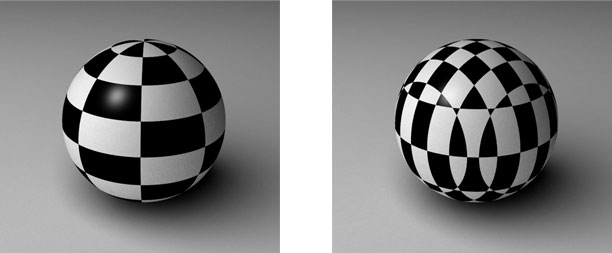
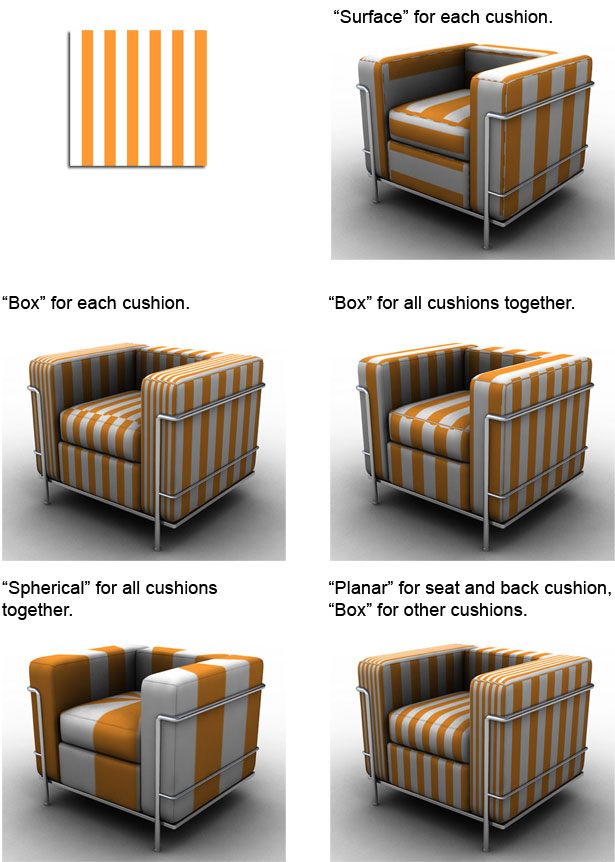
For the textures in your materials to look correct when applied to your model, you need to understand the concept of texture mapping. Look at the two spheres in the images below. One sphere has a checkered texture mapped around its own UV coordinates. The other has been mapped with the identical texture projected on to it as if from a flat plane. This is due to a different texture mapping method chosen for each sphere.
Edit texture mapping
- With any surface or polysurface selected, edit its Properties.
- From the list at the top of the Properties dialog, select Texture Mapping. The default texture mapping projection for all objects is Surface. This means that textures will flow along the UV direction of each surface within the object.
- Check the Show advanced UI box.
- In the Advanced UI, click the Add button. This lets you create alternate methods of texture mapping materials.
- Under General, expand the Projection list.
- Select a different mapping style. In general, it is best to use a projection method that closely resembles the overall shape of your selection.
- Use the Show Mapping and Hide Mapping buttons to display or hide the texture mapping widget for the active selection. You can reposition this widget and alter the look of the resulting projection.
Box mapping example
In the following example, the square cushions of the sofa chair work well with Box mapping. However, two of the cushions respond better to Planar projection and were individually selected to change their texture mapping method to be planar. Using the same texture, several different projection methods are below.
Environments
A big part of how a rendering looks has to do with where the objects rendered are supposed to be. Changing the environment surrounding your model in Brazil produces more realistic lighting and reflections.
To change environments
- In the Material Editor select the Environments tab. The default or Basic Environment is a solid gray color. This solid color is all that will be reflected in the model and the resulting reflections can look a bit flat. Just as with the Material Editor, right-click a sample swatch for more options for working with environments.
- In the Tasks panel, click Create New.
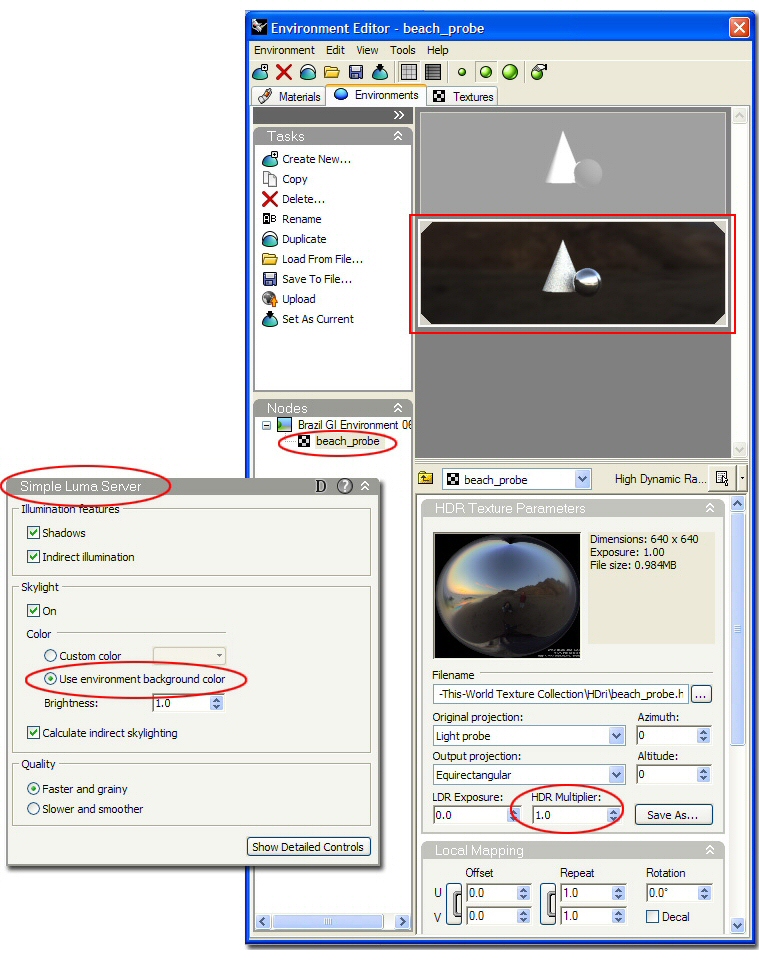
- In the Content Type Browser, select Brazil GI Environment. The environment appears as another sample swatch. It will look black at first.
Insert a High Dynamic Range image
- Download and save this HDR image of a beach provided by Paul Debevec http://www.debevec.org/Probes/beach_probe.hdr to try image-based lighting. This is one of the many HDR images available online for free or for sale.
- In the Brazil GI Environment node, in the Equirectangular Texture panel, right-click the slot labeled (none), and select Change from the menu.
- In the Content Type Browser, click the High Dynamic Range Texture button, and select beach_probe.hdr. The sample swatch updates.
- Double-click the GI environment thumbnail to make it the active environment.
Use the environment to light the scene
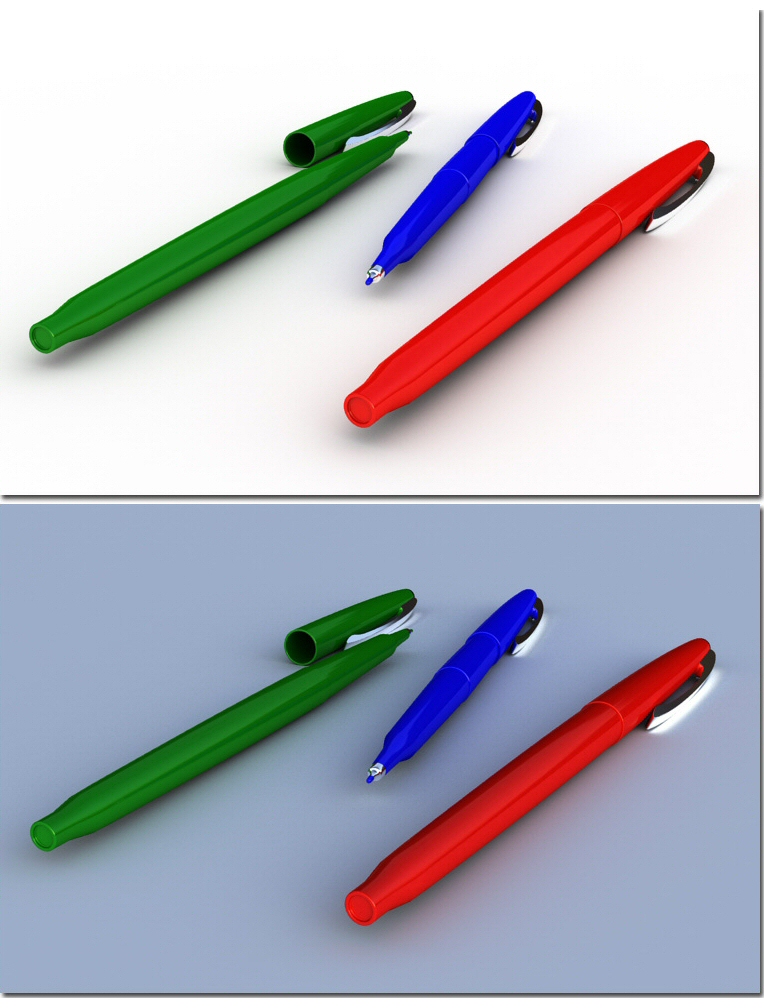
- In the Brazil Settings dialog in the Simple Luma Server panel, in the Skylight section, select the Use environment background color option. This option uses the HDR image from our active environment as the Skylight in our scene.
- Render with both options to see the difference. Notice that even when the HDR image is not being used as the Skylight color, the HDR image will still be used for the reflections to make our pens look glossier.
- To make the HDR lighting brighter, in the Environment Editor, in theHDR Texture Parameters panel, increase the HDR Multiplier value.
Save your work
Option settings, materials, textures, or environments can be saved and loaded into Brazil when needed.
In the Tasks panel fo the Material and Environment Editors, select Save To File and Load From File options.
You now have the basic building blocks to effectively use Brazil to render your Rhino models.
Be sure to check out more advanced tutorials and share your own work at www.brazil.mcneel.com.

