Sidebar
Brazil Options Explained
Brazil rendering system options
Summary: This page lists most of the options that are available in the Brazil for Rhino plug-in. There is a brief explanation of the purpose and effects of each one. Since Brazil for Rhino is not complete, some options are not yet implemented.
Options
You can open the Brazil options dialog via the Brazil menu, in which case you get a modeless dialog. It is also possible to access the options in a modal way through the regular Rhino Options dialog. The options are grouped in categories, in which each is represented by a collapsable frame. The UI is similar to the Brazil implementation in 3D Studio Max .
This page is a loose reference, not a sales brochure. If you do not yet have a copy of Brazil running, you're probably better off reading the Brazil features page.
The categories are:
Note: These settings all refer to the properties of the Brazil render engine, not to the properties of objects and lights. Light and Object settings can be reached through the standard Object Property Dialog in Rhino.
| The View options control the behavior of the virtual camera. Apart from a resolution (which is controlled via the Output Size options) and a shutter speed (which can be accessed via the Motion Blur options), the camera has a certain lens-type and a depth of field. Brazil currently comes with four different lenses: Perspective, Spherical, Orthographic, and Panoramic. The Perspective lens behaves the same as the Rhino perspective viewport, meaning you get a three-point perspective projection. This is technically an impossible projection, but our brains accept the illusion with a long enough lens-lengths. On the other hand, a Spherical projection is physically correct, because it uses a six-point perspective (two vanishing points for every axis instead of just one). The upshot of this is that straight lines in space become curved under most conditions which makes it less useful for a CAD modeling environment. With short lens-lengths the spherical projection starts to behave as a Fish-eye lens. Note that since the spherical projection cannot be represented in the viewport, you cannot use the Rhino view to accurately position the camera. An Orthographic projection in Brazil is the same as a Parallel viewport in Rhino. The Depth-of-Field options let you specify settings that introduce an imperfection which makes the virtual camera behave more like biological eyes and photographic lenses. In physics, a lens system always has a focus distance, at which the image is at its greatest crispness. Any objects which are closer to or further away from the camera than this focal distance start to become blurry. For a more in-depth description of the DOF implementation in Brazil see this wiki page. | 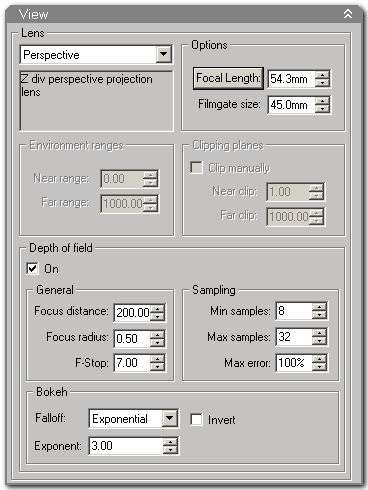 |
| This is one of the most important features of Brazil, one that must be mastered (or at least well understood) by professional users. I highly recommend you read the Brazil Rendering System Sampling on this wiki. When the sampling is set too high the rendering will progress slowly without a clear increase in image quality. If the sampling is too low then the image will become grainy or blurry when certain conditions are met. The Sampling parameter frame specifies the minimum and maximum allowed sampling densities. There are three defaults: P1 (Preview), P2 (Medium), and P3 (Production). The Adaptive tests frame gives you control over the fine-tuning of adaptive thresholds which control when Brazil switches from minimum sampling to maximum sampling. | 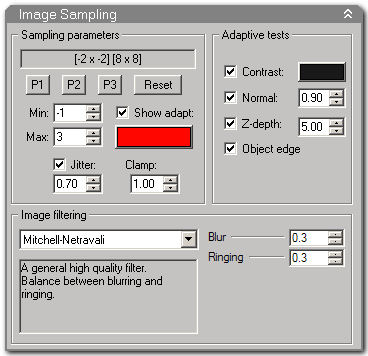 |
| Motion Blur only works when the Bongo animation plug-in for Rhino is installed. When you have moving objects in your scene, Brazil can ask Bongo where objects are headed and where they came from. The direction and speed of objects is then combined with the camera shutter speed to calculate the region of space which the moving object occupies for the duration of a single rendering (the shutter time). Motion blur can be enabled for moving objects but also in case you have a moving camera (in which case all objects have a speed relative to the camera and all objects are rendered with motion blur). | 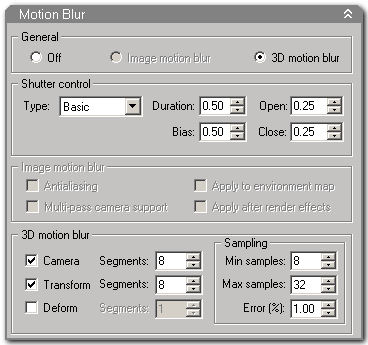 |
| The Luma Server is also an extremely important category, one that you must become comfortable with to get the most out of Brazil. The Luma Server is all about light and how it propagates through the scene. Note that light objects also have a myriad of settings which influence the behavior of individual lights (shadows, decay, attenuation, projection etc.), but the Luma server is about scene lighting. The General frame allows you to enable or disable shadow casting and the default light. The default light is only used when you have not specified any light source objects in your scene. Without any light sources the rendering will become completely black. But it is possible that you have defined materials which cast photons into the scene, in which case you may want to uncheck the default light. Direct illumination is the simplest possible lighting scheme. In direct lighting, every rendered point in the scene checks how many lights are visible from its location. Every light which is visible contributes to the brightness of the sample. Point and Area lights are represented by Light objects in the Rhino model, but the Skylight is a purely virtual construct derived from the Environment settings in Brazil. The settings for the behavior of the Skylight are located at the bottom of the Luma Server dialog. Indirect illumination is a more advanced lighting scheme which also takes lit geometry into account. See the feature page for further details. Since Indirect Illumination is potentially an endless process, there are many tricks to short-circuit a calculation and get a premature, but accurate, result. This requires a fair understanding of how GI works. This is not the place for such an essay, see Wikipedia for a more in-depth discussion. | 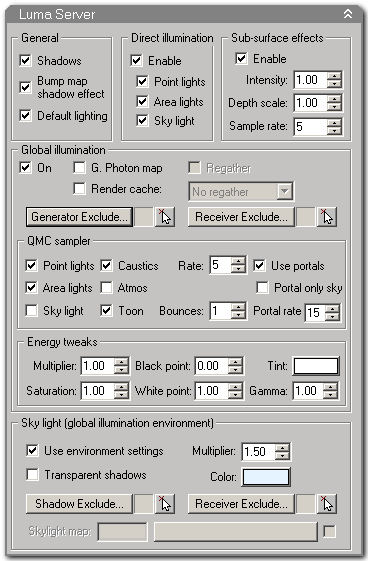 |


