Sidebar
Brazil r/s 2.0 for Rhino
Using the Brazil Render Cache with Auto Occlusion for fast renderings.
Download example files The following show how to use Brazil's Render Cache Auto-occlusion option. Using Render Cache is a fast method of calculating global illumination in Brazil. The trade-off for speed is non-realistic shadows where your model makes contact with the ground plane.
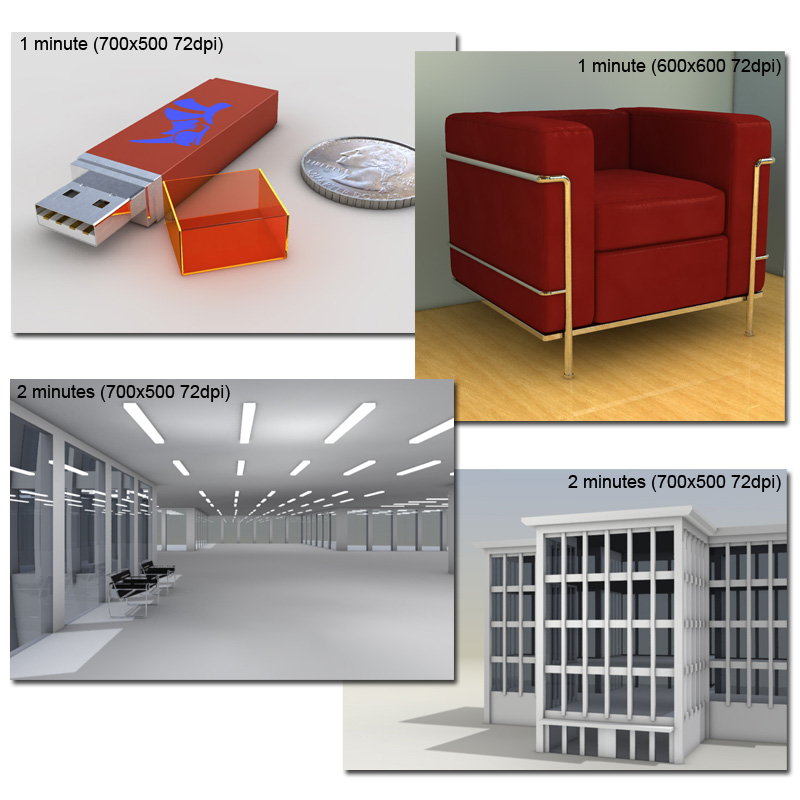
When creating renderings large format renderings for print or creating many renderings for an animation, using Auto-occlusion can speed things up. For example, the LC2 chair rendering was output at 2000×2000 pixels (translating to a 7×7-inch print at 300 dpi) in 12 minutes. To get good results, set the Render Cache values based on the physical size of your model.
Auto-occlusion Settings
When using the default Render Cache settings, shadows are often not dark enough. As a result, your model may look like it's floating. The Auto-occlusion option creates shadows based on an object's proximity to other objects in the scene. You can control the color of the shadow and how far the shadow will spread where objects meet.
To start using the Render Cache, in the Brazil Settings dialog, expand the Render Cache panel and click the Show Detailed Controls button. Review the Brazil Getting Started Guide to learn how to turn on the Skylight.
Determine shadow distances
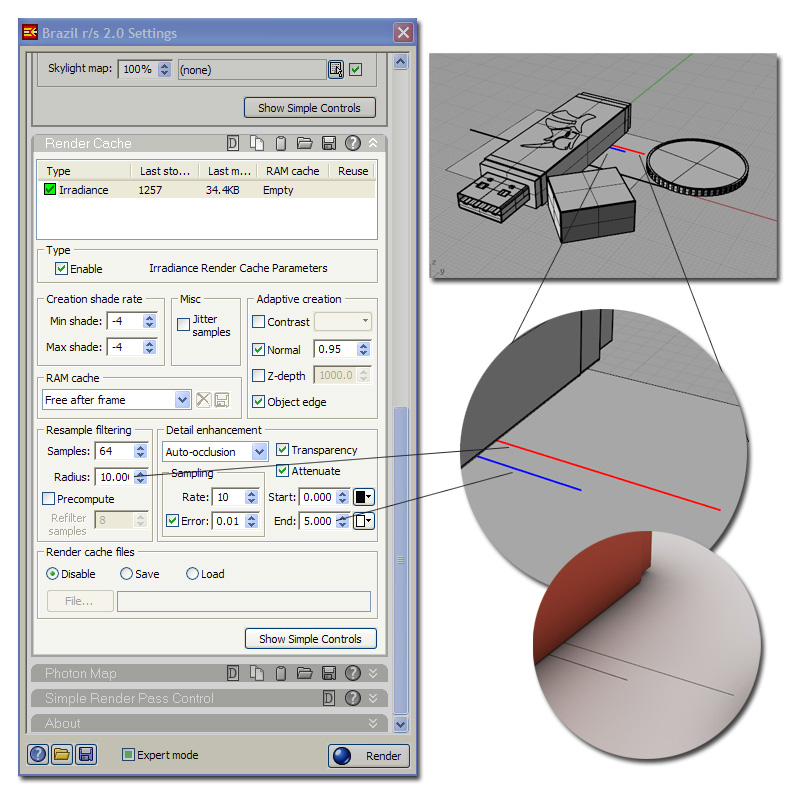
The screen shot below shows the two measurements used when setting up the Rhino Drive scene. The first measurement is the length of the shadow where two objects meet. In this case, the Rhino jump drive is making contact with a ground plane. Use the Rhino Distance command to calculate the size of the shadow. This distance is represented by the blue line. In the Detail enhancement section, enter the distance as the End value for the Auto-occlusion setting.
The second measurement is the distance you want Brazil to resample the shadow. This distance is represented by the red line. In the Resample filtering section, enter this value for the Radius setting.
In general, a value of 10 is a good place to start. A common reason to increase this value is when the ground plane looks pixelated because Brazil is not resampling far enough into the scene. Raise this value if you see undesired splotches or uneven areas in the shadows.
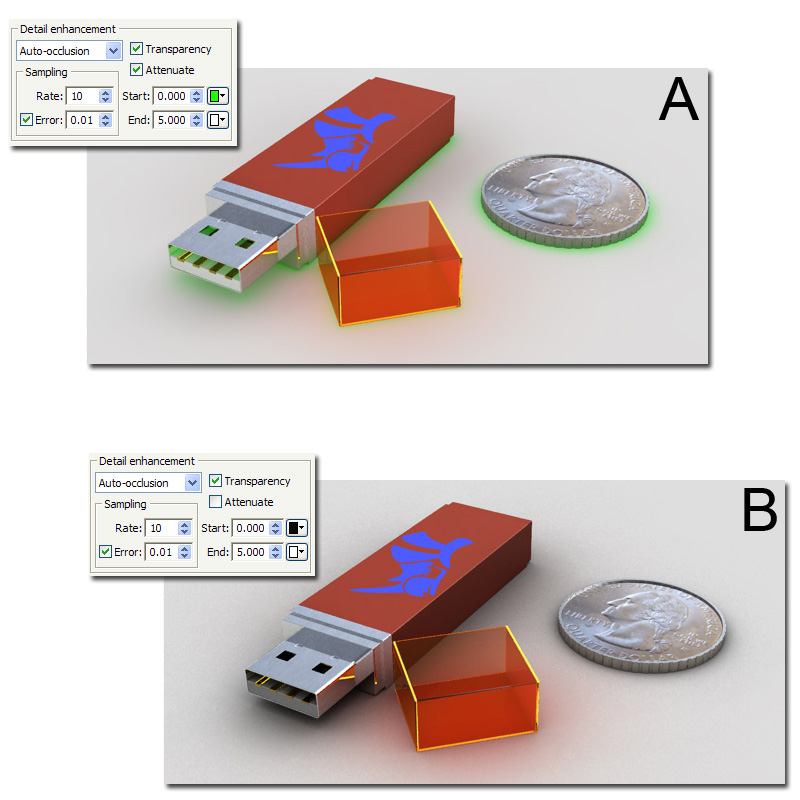
It is easier to see the shadows made with the Auto-occlusion option if you change the start color. In Example A, the color for the Start value was set to Green. While a dark gray shadow is usually best for realistic results, using a color can make the shadow more visible for testing. In Example B, the Attenuate checkbox has been cleared, so the shadow will not begin to fade out until it reaches the specified End distance. The shadow instead blends into transparency starting at the half-way point along its length. Compare this with Example A, which was made with Attenuate on.
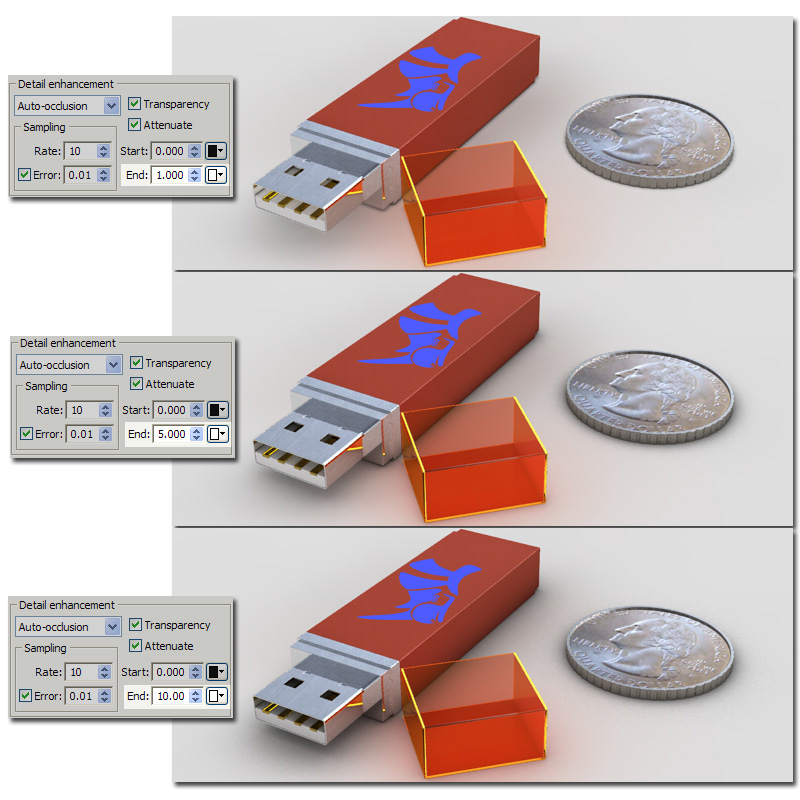
The following examples show the results of using different End values for the Auto-occlusion. The size of your model is important when determining the right setting to use. The distance values in the Brazil options use the same units (millimeters, inches, feet) as your active Rhino file.
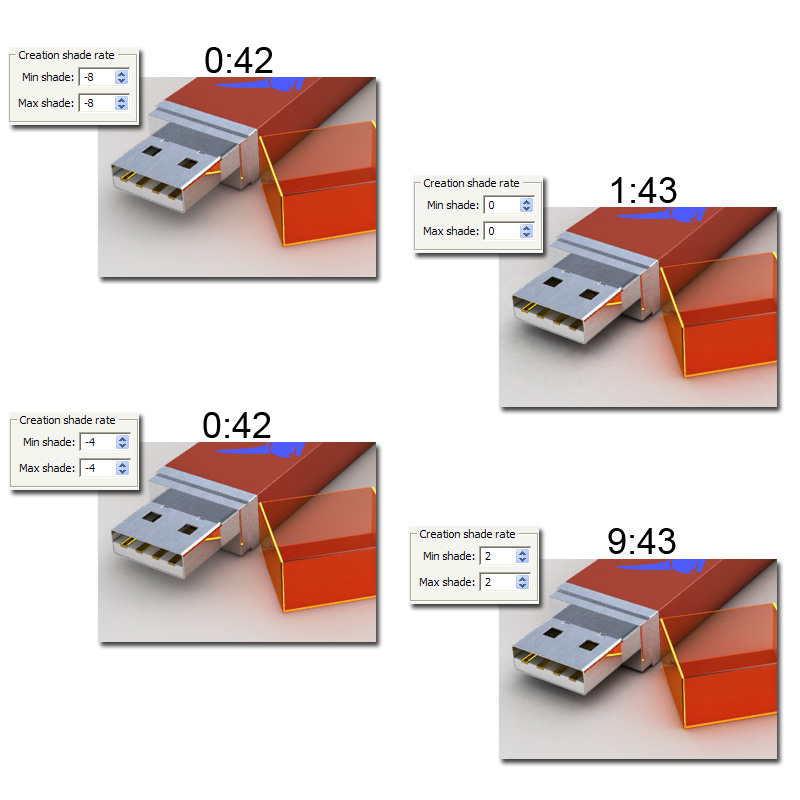
The Creation Shade Rate settings correspond to the level of detail calculated by the Render Cache. Higher values produce more detail but take longer to calculate. For the examples provided here, a setting of -4 was used for both Min and Max shade values. When other sampling values in the Render Cache are high, the difference in Creation shade rates is hard to see; however, the time differences can be significant.
Sampling
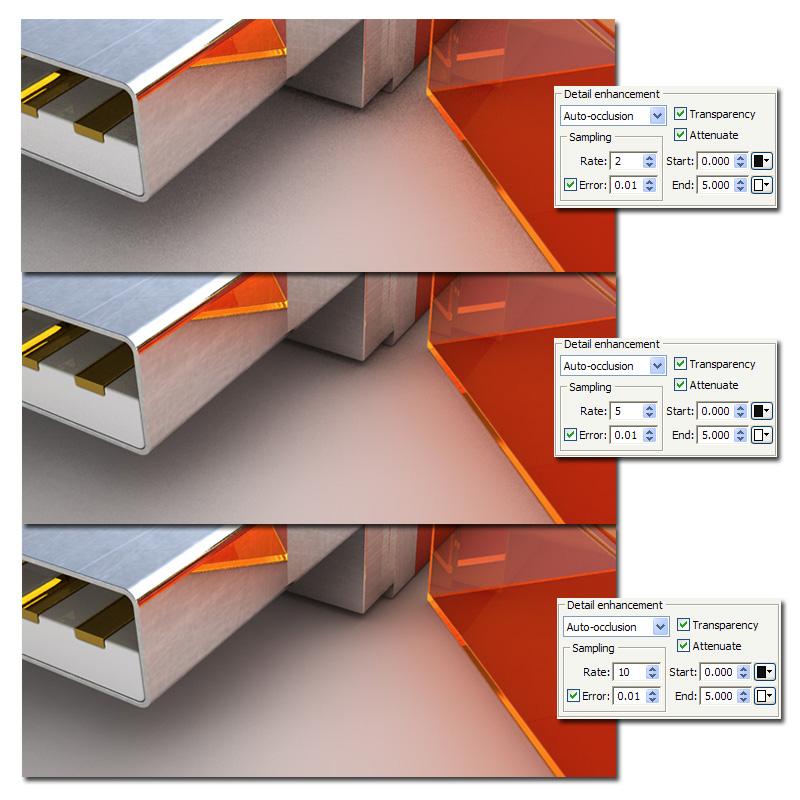
The smoothness of the detail in the shadow gradients is mainly controlled by the Sampling settings. The examples demonstrate Sample Rates of 2 through 10. In this case, the graininess produced at lower sample rates is most noticeable at the setting of 2. The render time will be faster at lower settings but at the price of quality. Generally a setting between 5 and 10 is best for most models.
Resampling filtering
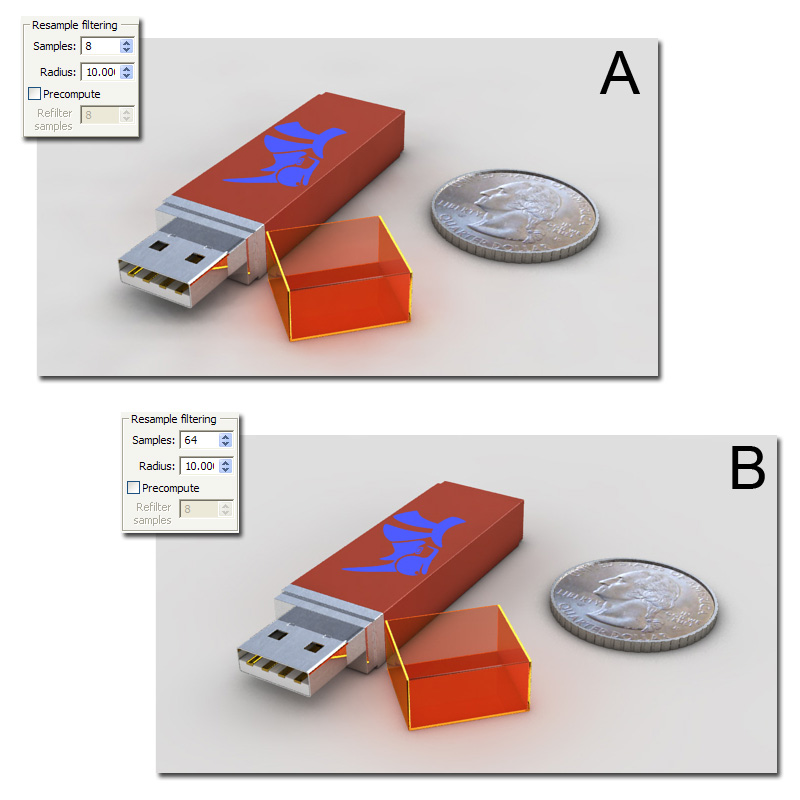
The resolution of shadow areas can be further improved by raising the number of samples in the Resampling filtering section. Higher values will smooth out splotches in the shadow gradients.
Conclusion:
This technique may not be as realistic as just using the Skylight with GI and a high sample rate in the Luma Server but can be much faster. Using Auto-occlusion in conjunction with an HDR image in a GI environment is worth trying if speed is important.
