Sidebar
GHowl Google Earth Tutorial
GHowl is a grasshopper plugin created by Luis Fraguada to extend the functionality of Grasshopper when it comes to accessing external data sources and applications. It allows grasshopper users to import/export information from Grasshopper to Excel sheets, Google Earth, Query online Databases and it also has the ability to connect to processing, and Interact with Grasshopper from smartphones.
Getting Started:
1. Install ghowl from: http://www.food4rhino.com/project/ghowl?ufh
2. Install Dependencies from: Exercise files» Dependencies» OpenXMLSDKv2
The dependencies must be installed for the spreadsheets to work, otherwise it is not necessary for working with google earth.
Getting terrains from Google Earth to Grasshopper:
In Google Earth, enter the desired location. Make sure the North is pointing upwards and the scale of the legend is not more than 500 meters because of Google Earth API’s limitation. This is discussed later in this tutorial.
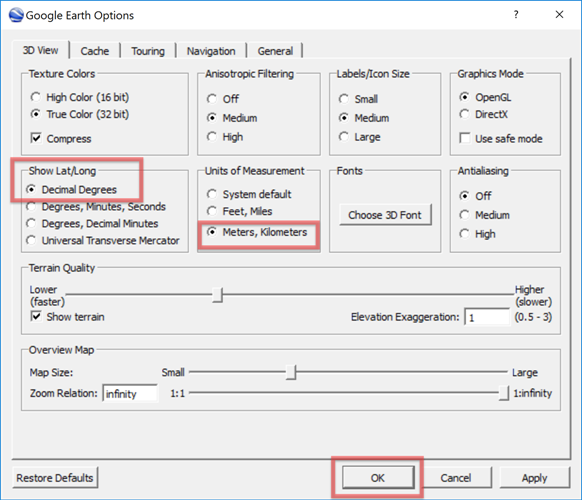
On the top toolbar, go to tools » Option and change these settings:
Show Lat/Log: Decimal Degrees Units of measurement: Based on preference “Meters, Kilometers” are used for this tutorial.
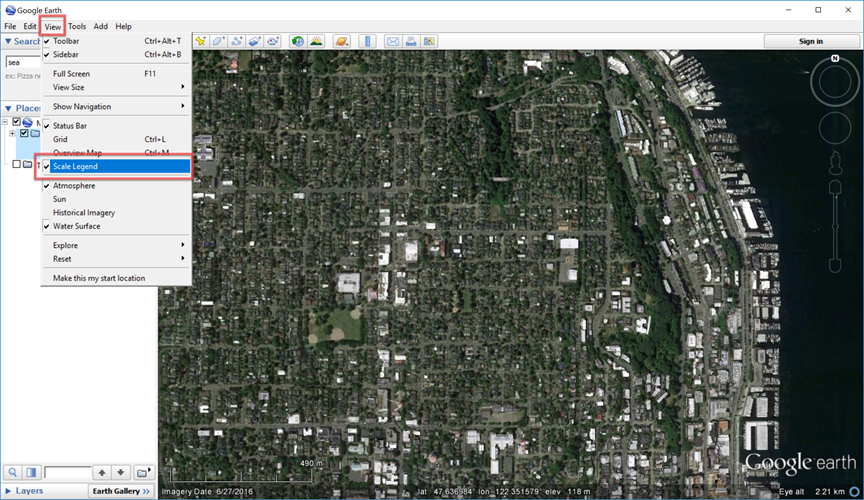
Again on the toolbar, go to View » make sure “Scale Legend” is turned ON:
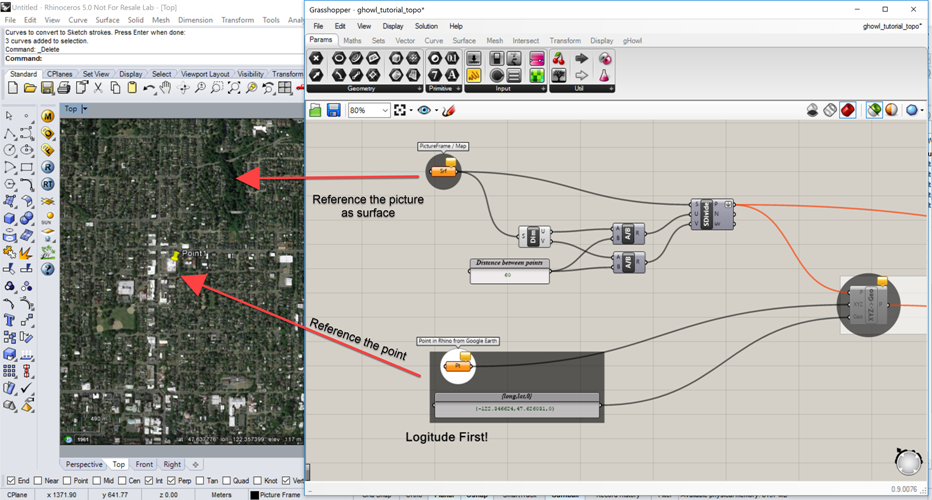
Add a point, name it and write down its latitude and longitude: This is done to reference the point in grasshopper with the world’s coordinates. Make sure you type the Longitude first.
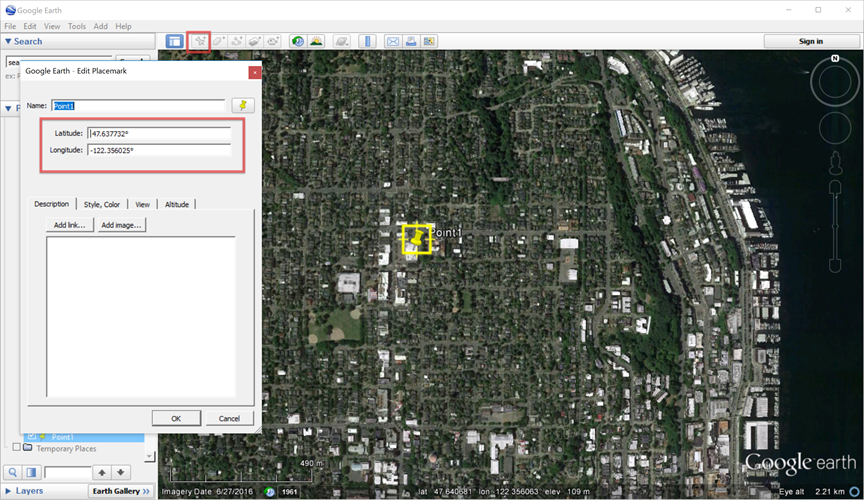
save the image. Make sure the legend is shown on the bottom.
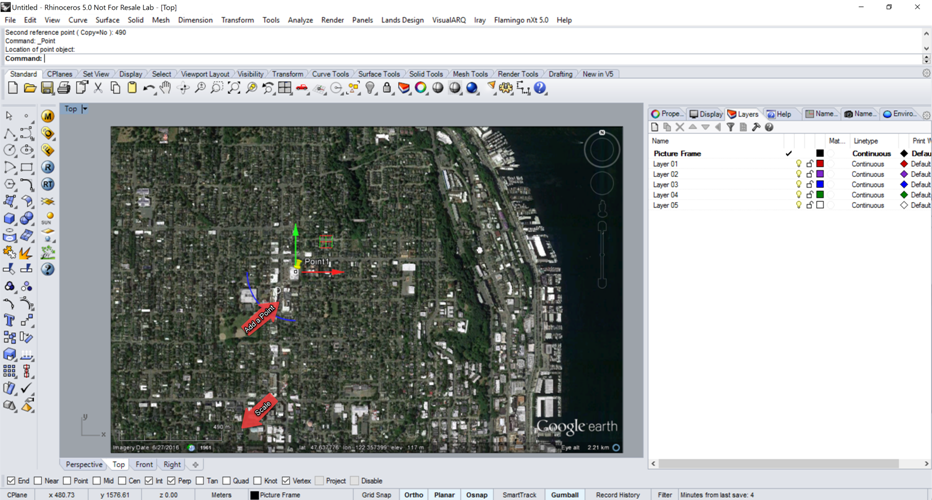
Open Rhino “Make sure the you use the same units as Google Earth”. Type in “Picture frame” and bring your Google Earth image in Type Scale2D and rescale the image based on the legand
Then add a point where the referenced google earth point is.
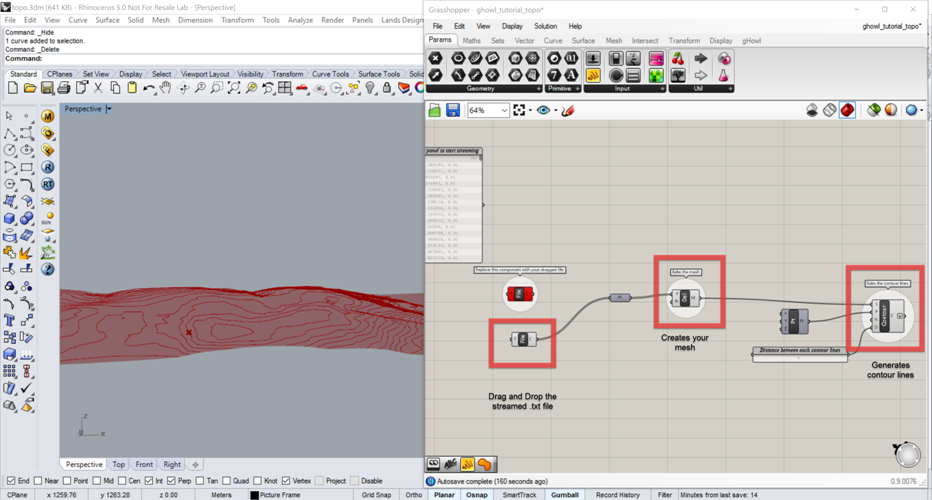
Open “ghowl_tutorial_topo” and reference the image as a surface and the point as a point in grasshopper. Under the point enter the longitude and latitude respectively : {long,Lat,0}
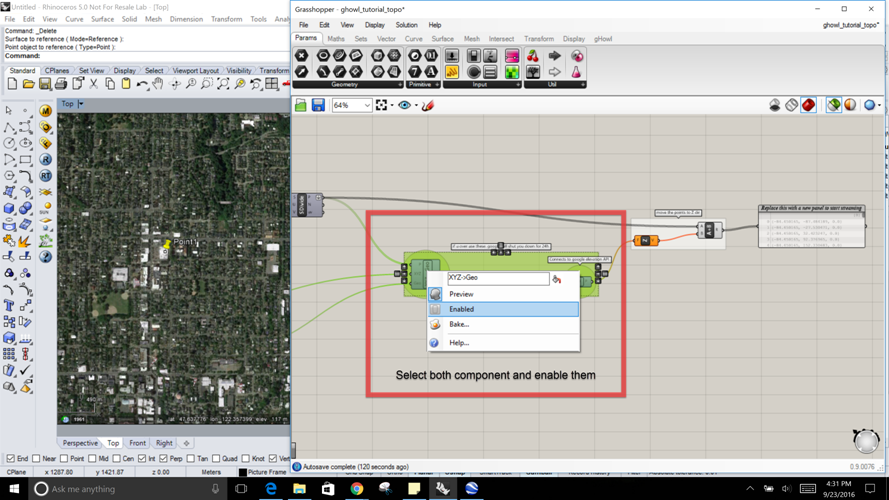
Now the component for getting the elevation connects to google API and it has limitation on how many times you use it per day and how big the image is and how long the component is used. The way around it is to disable it after getting the information needed. So go ahead and enable the two disabled components and replace the panel at the end.
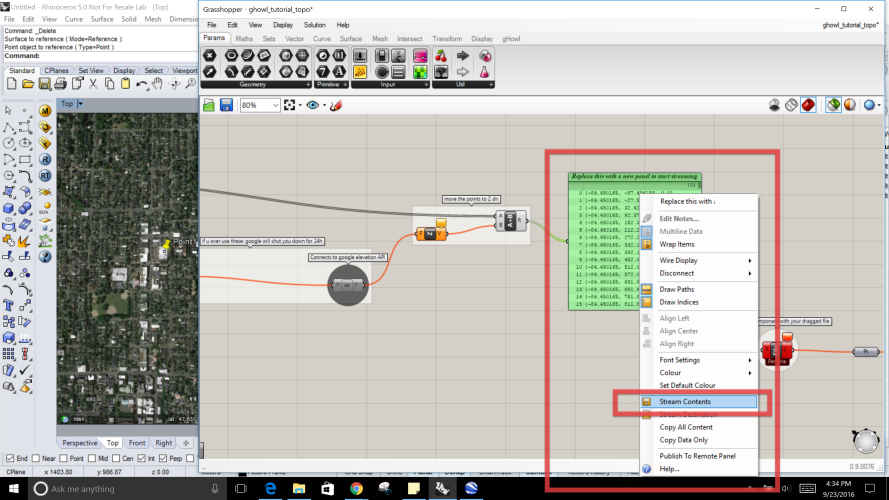
Once that is done and you can see a list of points in the panel » right click on it and stream the content to a location » let’s say desktop » name it “mylocation.txt” »
Now go to the desktop and rename it again “mylocation1.txt” Now go back to grasshopper and disable both components again.
FYI: if you do not rename the stream, once you disable the components the saved file will be deleted. Streaming the content is saving the coordinates of the elevation from google’s API to a text document. This is done to save the information somewhere other than in grasshopper so that you do not exceed your limits with Google Earth, because if you do, google will not allow you to get any information from its API for the next 24 hours.
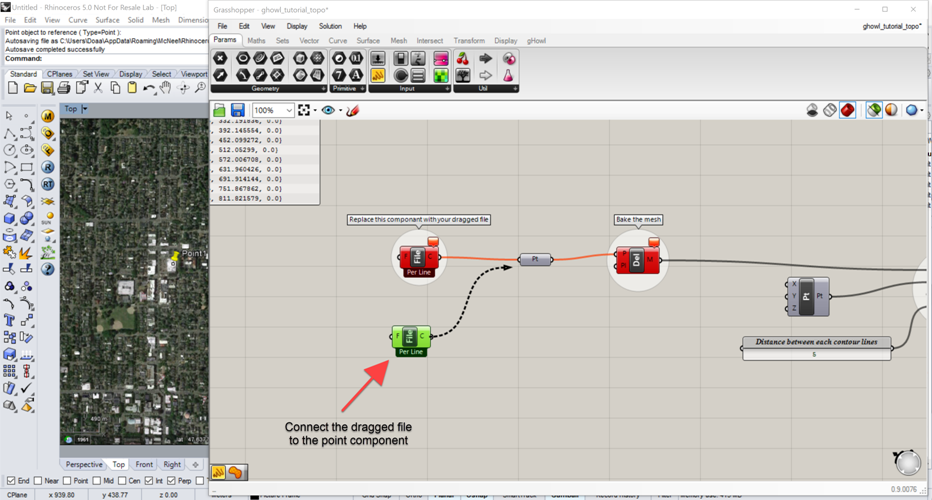
Now drag the “.txt” file you just created to the grasshopper canvas. A file component will show up.. then hook it to the points component to view the points on your topography.
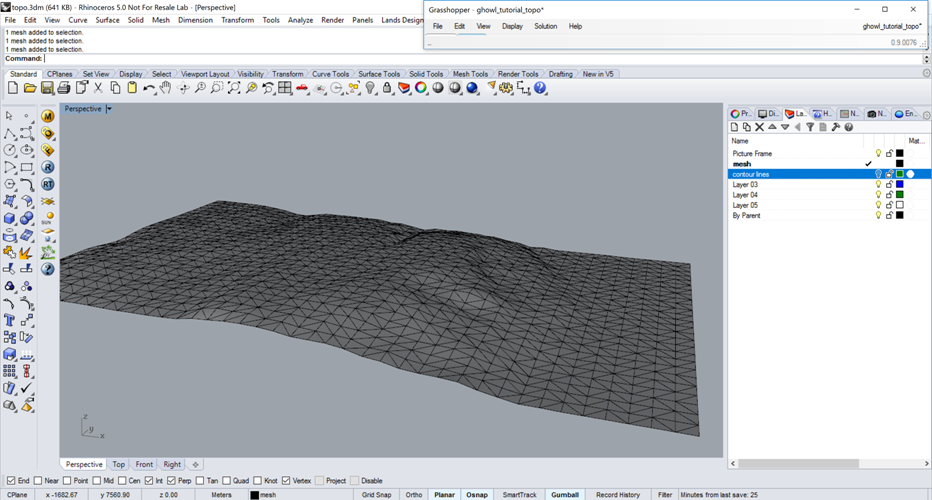
On Rhino Viewport the topography with contour lines is created.
Bake your mesh and contour lines on separate layers and go to Rhino.
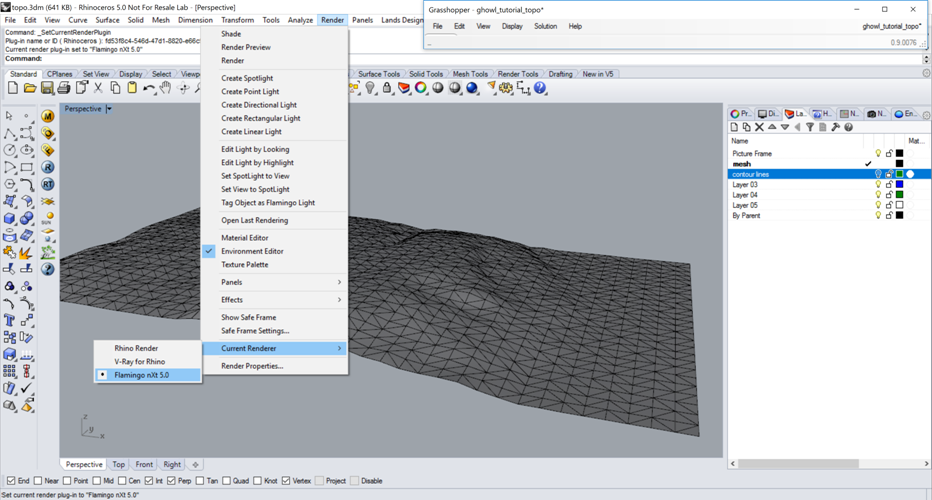
Applying google earth image on the mesh and rendering with Flamingo nxt 5.0:
Hide the contours and make sure your current render is Flamingo nxt 5.0.
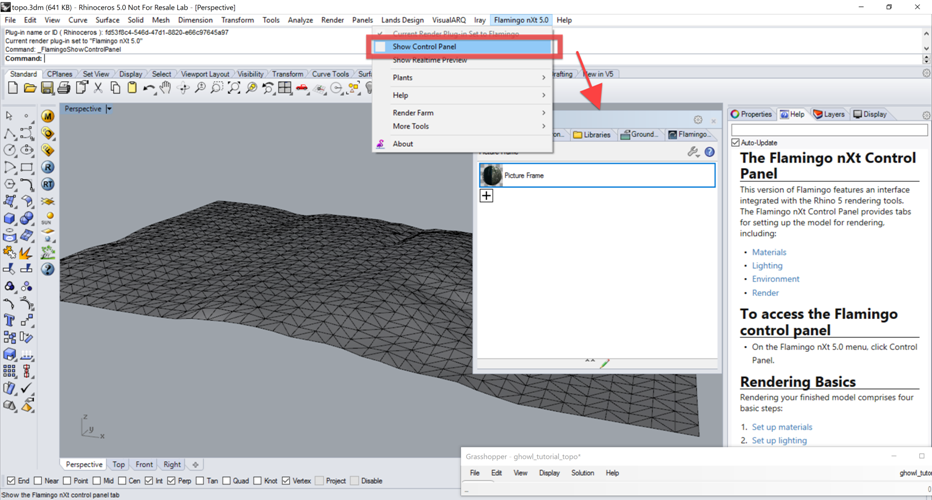
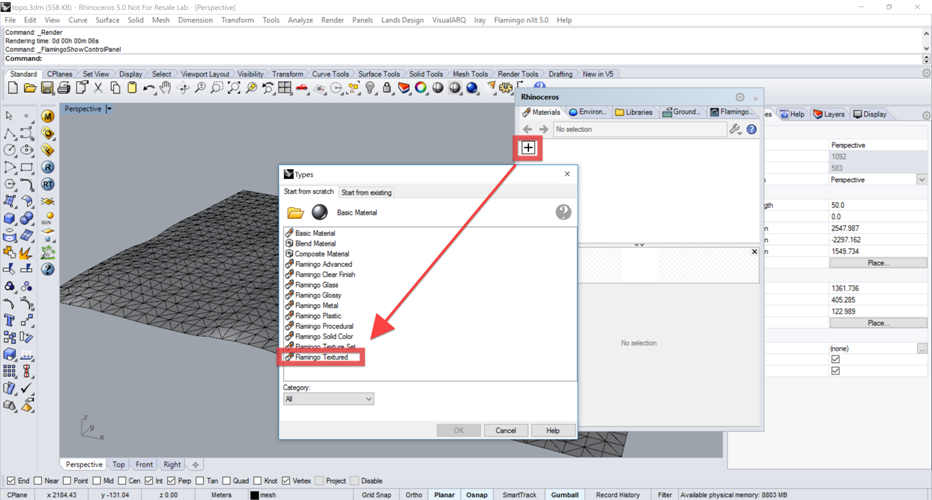
Open Flamingo’s control panel.
Add a new Textured material.
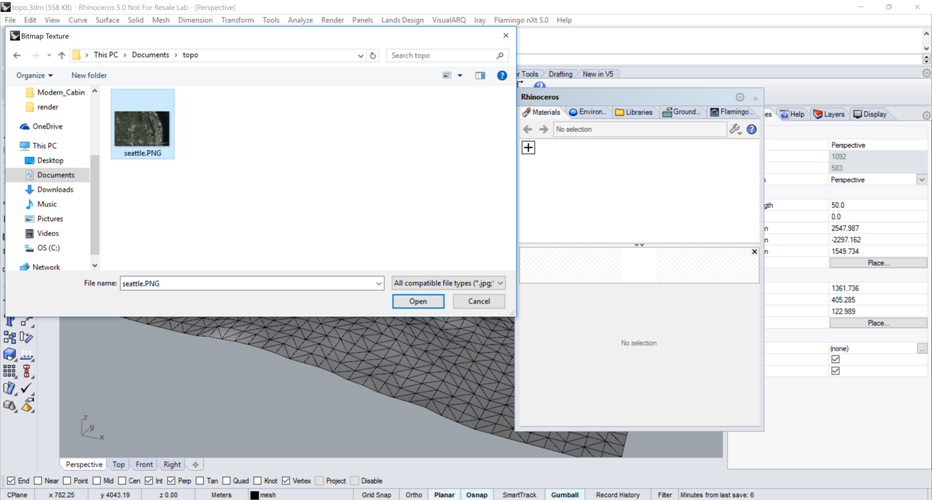
Browse to find the google earth screen capture, and open it.
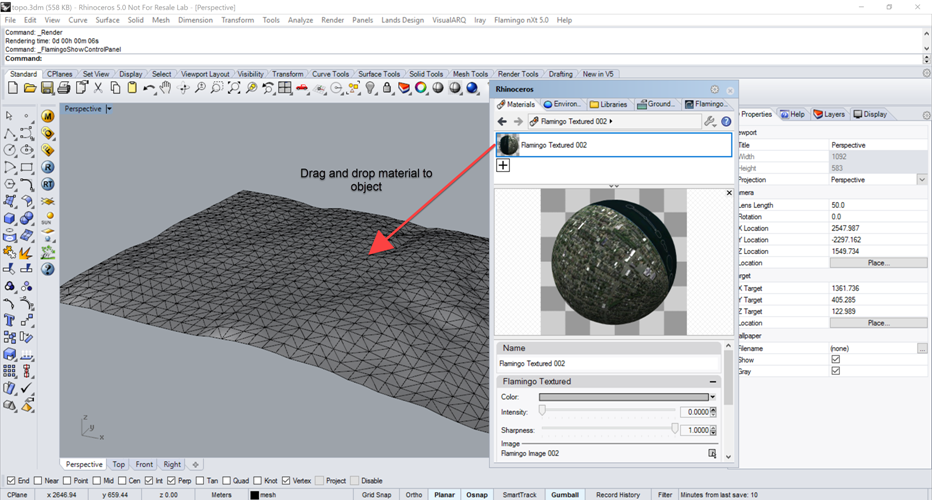
Drag and drop the material to the mesh.
Now apply planar mapping to the mesh from the top view. Make sure that vertex Osnap in activated to properly align the mapping. Use UV mapping when prompt on the command line.

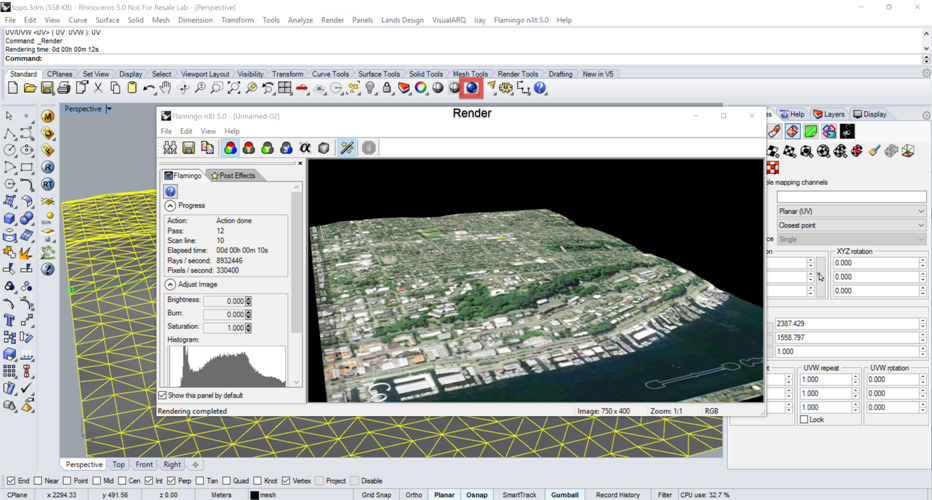
Now Render.
rhino/topo.txt · Last modified: 2020/08/14 (external edit)